
Priming A Water Pump - Step By Step
24 September 2024
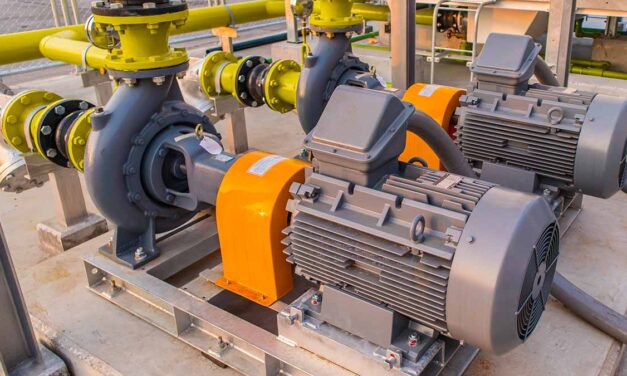
Priming a water pump is essential to ensure it functions efficiently and doesn't incur damage. A water pump, especially a centrifugal pump, relies on being filled with water to work correctly.
When air enters the system, it disrupts the suction line, causing the pump to lose its ability to move water. We look at the steps in the process for priming a water pump while addressing common issues that may arise during the process.
Why Priming is Necessary
Priming a water pump removes air pockets that form in the suction piping and pump casing. These air pockets prevent the pump from functioning properly by disrupting the suction needed to move liquid through the system. Centrifugal pumps and self-priming pumps require consistent water flow in their impeller to maintain pressure and circulation.
Air in the pump system can cause severe damage due to dry running. Without priming, the pump can overheat or experience cavitation, leading to long-term wear and potential system failure. Therefore, keeping the pump primed guarantees efficient water flow and prevents issues related to low pressure or malfunction.
Tools You’ll Need
To successfully prime a water pump, you’ll need the following essential tools:
-
Garden hose or independent water source (to provide the water for priming)
-
Water pressure gauge (to monitor pressure levels)
-
Wrench / shifting spanner (for loosening and tightening connections)
-
Bucket (if necessary to transfer water manually)
-
Screwdriver (for valve adjustments)
-
Strainer basket (to check for debris in the system)
Ensuring you have these tools on hand will expedite the priming process. Each of these items play a role in efficiently filling the pump casing and clearing out any air from the system.
Step-by-step Process to Prime a Water Pump
1. Turn Off the Power
Begin by cutting the electrical power to the pump. Locate the breaker panel and ensure the pump is completely off to prevent injury. This is important for safety, especially when dealing with water and electrical systems simultaneously.
2. Open the Priming Valve
Locate the priming valve on the top of the pump. Slowly open the valve to allow air to escape. This step is to release any trapped air within the system.
3. Fill the Pump with Water
Attach a garden hose to a water source and fill the pump casing until you see water at the opening of the priming valve. If no hose is available, use a bucket to fill the pump manually.
4. Inspect the Suction Line
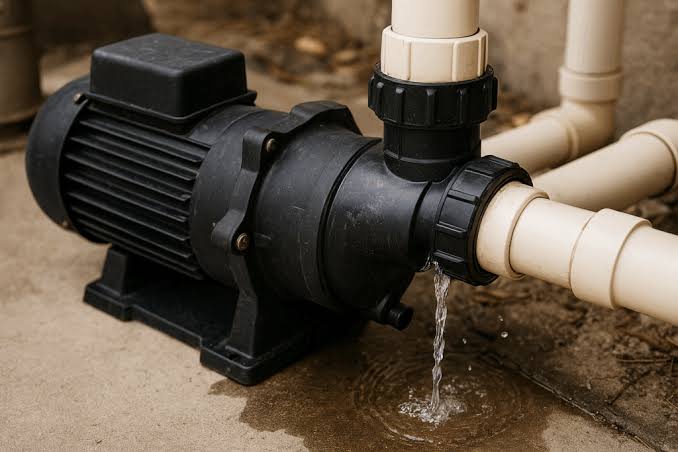
Check the foot valve and suction pipe for leaks or clogs. Any obstruction in the suction line will prevent water from flowing smoothly. Ensure that all connections are tight and properly sealed to avoid future issues.
5. Close the Priming Valve and Re-start the Pump
Once the pump casing is full of water, re-tighten the priming valve and turn the power back on at the breaker panel or at the switch. Allow the pump to run for about a minute to ensure that it can begin pumping water effectively.
6. Monitor the Water Flow
Watch for water movement in the discharge line. If the pump is functioning properly, water should flow steadily within a few seconds. If you notice air bubbles or low pressure, there may still be air trapped in the system that needs to be expelled.
7. Check the Water Pressure Gauge
A steady reading on the water pressure gauge indicates that the pump has achieved the proper pressure and priming is successful.
Image source: https://justwaterpumps.com.au/
Common Issues During Pump Priming
Airlocks
Air trapped in the system can disrupt the priming process. If the pump doesn’t maintain pressure, it’s likely that there is air in the suction piping or pump casing. Open the air release line and slowly release any remaining air to allow the water to build up.
Leaking Suction Pipe
A leak in the suction pipe can cause the pump to lose prime. Check all joints and ensure there are no visible leaks. If necessary, apply re-tightening measures to fix any loose connections.
Clogs in the Foot Valve
Inspect the foot valve and strainer basket for debris that could block the water flow. Regular cleaning of these components can prevent clogs from causing the pump to lose prime.
How to Maintain Your Water Pump After Priming
Proper maintenance ensures your pump stays primed and operates efficiently. After priming, always check the wear plate and impeller for signs of damage. A centrifugal pump may develop wear over time due to friction, reducing its efficiency.
Perform regular checks on the relief valves, ensuring they are not blocked or leaking. Maintaining an optimal pressure level in the water tank is critical for the continued function of the pump. Additionally, inspect all piping and valves for signs of wear, corrosion, or blockage.
It’s important to monitor pump priming time and water flow regularly. If priming takes longer than usual or there is a noticeable drop in pressure, investigate the cause immediately to prevent long-term damage.
Safety Precautions While Priming
When priming a water pump, follow these safety precautions:
-
Always turn off electrical power before starting the priming process.
-
Use safety guards around the pump to protect against accidental injury.
-
Ensure the pump casing is secure and free of cracks that could cause leaks.
-
Never operate the pump without water in the system, as dry running can cause overheating and damage.
-
Be cautious of hot surfaces if the pump has been running, and allow it to cool before handling.
Final Notes
Priming a water pump is a simple but crucial process to maintain efficiency and prevent damage. By following these basic steps - turning off the power, filling the pump casing, and releasing air - you can ensure that your pump operates correctly.
Regular maintenance, such as checking for leaks and cleaning the foot valve, will help maintain the longevity of the pump system. Always adhere to safety guidelines to avoid injury or pump damage during the priming process.
Proper priming guarantees reliable water flow, helps maintain optimal pressure, and extends the pump’s lifespan. Following these steps ensures your water system remains functional and prevents costly repairs or replacements.
Popular Questions
Below are common questions we get asked about priming a water pump.
How Often should I Prime My Water Pump?
If your pump system is functioning correctly, priming should only be required when the pump loses prime due to factors like air leaks, dry running, or improper sealing of the foot valve. In some cases, self-priming pumps automatically reprime after a loss of prime.
Regularly inspect your pump for leaks or obstructions to minimize the need for priming. For non-self-priming systems, priming may be required after maintenance or long periods of inactivity.
What can Cause My Water Pump to Lose Prime Repeatedly?
Repeated loss of prime is often caused by air leaks in the suction line, a faulty foot valve, or a cracked pump casing. A worn impeller or clogged strainer basket may also interfere with water flow. Ensure that all piping connections are tightly sealed and regularly inspect the pump for any signs of wear or leaks to avoid recurring priming issues.
Can I Use Any Type of Water to Prime My Pump?
It is recommended to use clean water to prime your pump, as dirty or debris-laden water can damage the impeller or block the suction pipe. For well or pool pumps, make sure to use water from the same source that the pump will be drawing from. Avoid using corrosive or contaminated liquids to prevent damage to the pump’s internal components.
What our customers say
We have used Aaron's service a few times now and he has always replied promptly, given a definite time, and fixed the…
A big thank you to Aaron. Out of 6 companies I'd emailed requesting a ballpark quote for a to-do listing, only Mayfair…
Related Posts
When to Service a Water Pump in Adelaide
22 June 2026
Water pumps should generally be serviced once a year. Learn the service schedule by pump type, warning signs to watch for, and when to call a licensed Adelaide...
Signs a Water Pump Needs Replacement or Repairing
12 June 2026
A failing water pump rarely stops without warning. Learn the early signs — noise, low pressure, leaking, tripping and more — and when to call a licensed Adelaid...
Condensation Pumps for Split System Air Conditioners
18 Mar 2025
If you live in Adelaide, you will notice that the summer weather can get quite humid throughout December, January and February. When the humidity level is high,...